

 Guide to Backup by Google One: A Short Summary
If you need more storage space than the free 15GB of Google Drive that comes with every Google Account, a subscription to Google One might be the way to go. Backing up your data with Google One is easy and quick, even when it comes to your Android and iOS devices.
To back up your most important files with Google One, simply follow the steps below.
- Navigate to Google One and log in with your Google Account.
- Purchase a Google One subscription plan.
- Click on the Google apps button on the top-right corner of the page.
- Click on “Drive” to access My Drive.
- Click on “New” to upload files or folders from your computer.
- Click on the files you want to upload.
Once your files are done uploading, they will be successfully backed up onto the cloud.
We’ll tell you how to back up your data with Google One in more detail below, as well as how to set up your automated backup and more.

In today’s technology-driven world, our lives are tied to our devices more and more. From countless family photos on our cell phones to work and sensitive documents on our computers, it’s critical that we keep our devices securely backed up. Google One is a great option for both PCs and Android devices that need extensive backup storage with security.
What is Google One?
Google One is a membership subscription upgrade of Google’s Drive cloud storage service. The basic Google Drive free plan provides 15 gigabytes of cloud storage space, whereas the Google One subscriptions expand that free storage space to anywhere between 100GB to 30TB.
Like with Google Drive, the user’s data stored in the cloud is safe from computer crashes and can be accessed from any device with internet access through Google’s website or through the Google One app. The biggest benefit of Google One — besides more space — is that it gives the user the ability to back up data (automatically) across all Google products, including Android phones.
For more information about Google One, check out our detailed Google One review.
How to Subscribe to Google One
Subscribing to Google One is a piece of cake. All you need is a Google account and the steps below.
1. Choose a paid plan. There are multiple plans at different prices, each with its own storage size. Choose the one that works best for your needs by checking out the different Google One membership plans.
| Storage Plan | Monthly Price | Annual Price |
|---|---|---|
| 100GB | $1.99 | $19.99 |
| 200GB | $2.99 | $29.99 |
| 2TB | $9.99 | $99.99 |
| 5TB | $24.99 | $249.99 |
| 10TB | $49.99 | n/a |
| 20TB | $99.99 | n/a |
| 30TB | $149.99 | n/a |
2. Log in to the Google account you wish to upgrade.
Note: Google only offers Google One to their personal customers. Workspace accounts will receive an error. If you receive this error, click “Switch Accounts” and choose a personal account.

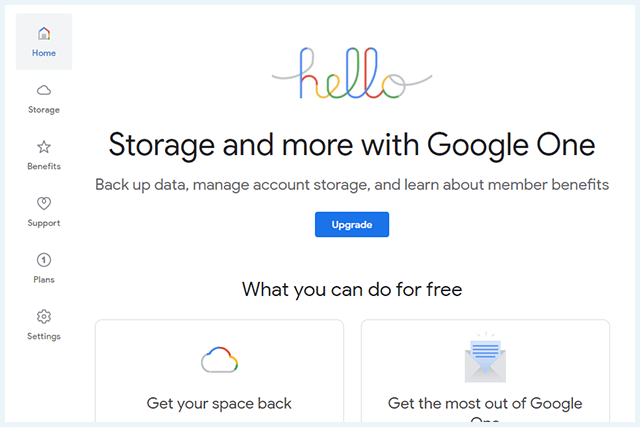
3. Click “Upgrade.”
4. Select the appropriate plan.

5. Choose your payment method and click “Subscribe.”

That’s all! Now you’ve got your own Google One storage and can save all your important online information.
Cloud Storage vs Backup Storage
Before we tell you how to back up your devices with Google One, we wanted to first cover the difference between cloud storage and backup storage. These terms are often used interchangeably, but there is a subtle yet important difference.
- Backup storage is used to store duplicates of existing files on a separate server or device in the event of data loss.
- Cloud storage is used to supplement one’s available space for storing and organizing additional files.
Simply put, backup storage is used to back up the information (and files) from your device if you need to reset or replace it, whereas cloud storage is used to keep files that do not currently fit on your device. Google One can be used for both needs and even offers automated backups.
How to Back Up Data on Your PC with Google One
Google One gives you two options for your backups: mirroring and streaming.
- Mirroring backups means the file is present on both your hard drive and the cloud storage. This has advantages and disadvantages: your files are available regardless of whether you’re online or offline, but since the files are also on your hard drive, they take up double the storage space.
- Streaming backups means the file is housed on the cloud storage but is linked to your computer for easy access. Again, this option has its pros and cons. The biggest advantage is that your computer’s storage capacity isn’t diminished. On the other hand, if you want to access the file offline, you’re out of luck.
If you’re using Google One just as a backup, mirroring is a great option. However, if you’re using the Google One app for additional storage, streaming would be a better choice.
You can back up your data with the Google One app in one of two ways:
- By adding your files to your expanded Google Drive storage space online
- Through Drive for Desktop
If you don’t want to download an application on your device, you can back up or store specific files or folders manually online. However, if you want to keep all of a folder’s content backed up to the cloud, syncing via Drive for Desktop is the easiest way to accomplish this. Both options will be explained below.
Store a specific file or folder online
To easily back up or store specific files or folders on Google One, follow the steps below.
- Go to Google.com and sign in to your Google Account.
- Click on the Google apps button in the top-right corner of the page. The icon looks like a gray square composed of nine small dots.

- Click on “Drive.”

- You should now be in My Drive. Click on “New” to upload files or folders from your computer. Beneath “File upload” and “Folder upload” are options to create other types of files and documents, including files or folders for Google Docs, Google Spreadsheets, and other applications.

- Select the files you want to upload and click “Open.”

- Once your files are done uploading, they will be successfully backed up onto the cloud.
Drive for Desktop backup and storage
Below are the step-by-step instructions for mirroring and streaming folders with Google Drive for Desktop.
1. Download Drive for Desktop through your Google Account.

2. Click “Install.”

3. Choose the appropriate account and sign in.

4. Choose either “Stream Files” or “Mirror Files,” depending on your wishes.

5. Choose the folders you would like to add to your Google Drive by clicking “Add Folder” and navigating to the appropriate folder. Click “Add.”

6. Once you have your folders set up, you can view your Google Drive from your desktop by going to “This PC” and then to “Google Drive.”

Syncing options for folders on Drive for Desktop
Google Drive for Desktop has two backup settings for synchronizing your backups:
- Google Drive Sync: With this option, all files in the folder (regardless of format and along with any changes) will be saved to your Google Drive cloud storage. The files can be accessed through Google Drive online or via the Google Drive app.
- Google Photos backup: With this option, only photo and video files will be uploaded to your Google Photos cloud storage. This option does not sync changes. Photos and videos can be accessed at photos.google.com or via the Google Photos app.
Back Up Your Phone with Backup By Google One
Purchasing at least 100GB of storage comes with an automatic phone backup feature for Android phones and iOS devices. Backing up your phone’s data is often a time-consuming and challenging task, but Google One makes Android data backup simple by automating that process.
When you use Google One’s automatic phone backup feature, the following data is backed up:
- App data
- Call history
- Contacts
- Settings
- SMS messages
- Pictures and videos
- MMS messages
We’ll show you how to navigate through your Android and iOS settings and create a backup below.
Automate your Android phone backup with Google One
Once the Android backup feature is enabled, your Android phone data is backed up on Google’s servers and protected by your Google Account password. Backing up your data can take up to 24 hours.
Google provides the following steps to enable an automatic backup of your Android phone data.
- On your Android phone, open the Google One app.
- At the top, tap “Storage.”
- Scroll to the device backup section.
- Tap “Set up data backup” if this is the first backup run on the phone and “View details” for subsequent backups.
- To see your backup settings, tap “Manage backup.”
- Choose your backup settings. If you get advised to install an app, update an app, or change your settings, follow the onscreen steps. Then, go back to the Google One app to finish.
- If asked, tap “Allow permissions.”
- At the top left, tap “Back.”
Once everything has been saved, “On” will appear beside each category of data saved to the Google cloud. Google One files the data under one of the three categories in the Backing settings section: device data, multimedia messages, or photos and videos. Multimedia messages require a device running Android 7.1.1 or higher to save.
There is also an option at the bottom of the screen to back up using mobile data. Careful: you may incur additional costs from your mobile device’s carrier if you choose to do this.
Google One backup for iOS
iPhone users can use Google One to easily back up their data as well. Different types of data will be backed up into different Google services: photos will be backed up to Google Photos, your contacts to Google Contacts, and your calendar to Google Calendar.
Before you begin backing up photos and videos, keep in mind that a Wi-Fi connection is required first. Only new photos and videos will be added to the backup if you choose to back up multiple times. Multiple backups will also overwrite prior backups for contacts and calendars. iOS users will only be able to back up individual photos and not retain the organized structures of photo albums.
To begin the backup, follow the steps below.
- Install the Google One app from the App Store on your iOS device.
- Launch the app.
- Tap the menu icon in the top left corner of the screen. The icon looks like three horizontal bars.
- Tap “Settings.”
- Tap “Backup.”
- Tap “Start backup.”
After the process completes, all of your photos, videos, contacts, and calendars will be backed up into your Google account.
Why You Might Want Google One
As most of us rely on technology for our personal and professional lives, you probably can’t run the risk of losing your most important data.
The 15GB of free storage space available to all Google users via Google Drive may not be enough to fully back up your data, which makes upgrading to Google One a worthwhile storage investment. Google offers a varied selection of Google One storage plans to choose from so you will only pay for what you need, and even get extra subscriber benefits in the process. Premium plans also come with Google One VPN, as long as you’re in supported territories.
Have questions about backing up your data with Google One? Here are some of the most frequently asked questions regarding data backups with Google One.
Google One is first and foremost a cloud storage service. It provides additional storage space (100GB – 30TB) in the event you need more than the 15GB of free space that comes with your Google account. Each subscription comes with its own benefits like extra features, discounts, and even a Google VPN. The Google One benefits are regularly updated so there’s always something new. Learn how to back up your data with Google One by reading the full article.
Some users worry that they will lose access to their files if they cancel their Google One subscription while having more than 15GB of data in storage. Don’t worry. Google won’t delete your files, but you won’t be able to add any new files until you’ve cleared enough space to go beneath the 15GB data cap.
If you have two or more Google accounts, you can keep all of your data synced and backed up in one place by making use of the “Share” feature.
- Sign in to your primary Google account.
- Go to drive.google.com.
- Create a folder you want to back up your data into.
- Add your files.
- Right-click on the folder and click “Share.”
- Add the email address of your other Google accounts.
Now your data will be synced and collectively shared among your other Google accounts.
Yes, Google One works on iPhone. It’s really easy to set up and use. For step-by-step instructions, read our article “How to Back Up Your Data with Google One.”
-

-

-

 https://vpnoverview.com/internet-safety/cloud-backups/google-one-backup/